Set up Keyboard
This guide assumes that you have already added the third-party extension keyboard and can select “ToMemo” when entering text. If you have any questions about this, please see 「Guide/Application Settings/Adding a Keyboard」.
Keyboard Settings Basics
Display Type
This setting is similar to the Display Type feature in the Memo section.It is used to set the content type displayed in the keyboard: Memo dimension or list dimension.
Memo Dimension
All Memos
List Dimension
All Lists
Auto-Reading Clipboard
Due to restrictions in the iOS system, clipboard reading operations can only be performed in active applications (i.e., those displayed on the screen).Auto-reading from the keyboard is one way the app can obtain monitored clipboard data.
This feature requires “Allow Full Access” to be enabled.
If you enable auto-reading from the clipboard, you need to read the instructions for using the clipboard and go to the system settings to enable the “Allow Full Access” permission.
From a privacy standpoint, “Allow Full Access” for the keyboard is a fairly significant privacy risk, so you should weigh the pros and cons of enabling it.
The ability to detect clipboard changes requires monitoring the clipboard in the keyboard, but this functionality is beyond the scope of an offline input method and is obtained from system services, thus requiring “Allow Full Access” to be enabled.
If you only need to use the content added in the “ToMemo” app’s quick entry function (lazy phrases), you do not need to enable “Allow Full Access”.
Also, note that ToMemo does not have its own server, so when “Allow Full Access” is enabled, ToMemo, including the keyboard, does not transmit any data to other systems, so you can use it with confidence.
Common Issues
After enabling “Auto-Reading Clipboard”, the keyboard still cannot recognize changes to the clipboard?
Prerequisite: “Allow Full Access” permission has been granted to the ToMemo keyboard in the system settings.
- Method 1: Switch to another input method and then switch back. Try copying text again.
- Method 2: Turn off the ToMemo keyboard in keyboard settings and then turn it back on. After the keyboard is loaded, try copying text again.
Automatically Switch Back to Previous Input Method after Inputting
In normal use, in most cases, only one Memo needs to be entered at a time. Then you need to return to the previous input method to continue entering text. When you need to enter text quickly using the ToMemo keyboard, you need to switch back.
Therefore, there is a need to automatically switch back to the previous input method after clicking on Memo input, otherwise, you need to manually click the switch icon in the lower-left corner, which is more cumbersome.
After enabling this function, the icon in the lower-left corner of the keyboard that can switch input methods will change.
For devices without a notch:
- If it is simply a globe icon, it means that the function of automatically switching back to the previous input method has not been enabled.
- If it is a globe icon with a left arrow, it means that the function of automatically switching back to the previous input method is enabled and will switch automatically after entering text.
For devices with a notch: This icon is hidden.
Pause Automatic Switching for this Input
Although in most cases only one Memo needs to be entered at a time, with the addition of the “Short-Term Memory” function, there are more scenarios in which multiple inputs are needed at once.
Therefore, after enabling automatic switching, a lock icon will also appear in the keyboard. Click the lock to toggle the “Pause Automatic Switching for this Input” function.
- If the lock is closed, it means the keyboard is locked and will not switch automatically after multiple inputs.
- If the lock is open, it means that automatic switching is functioning normally.
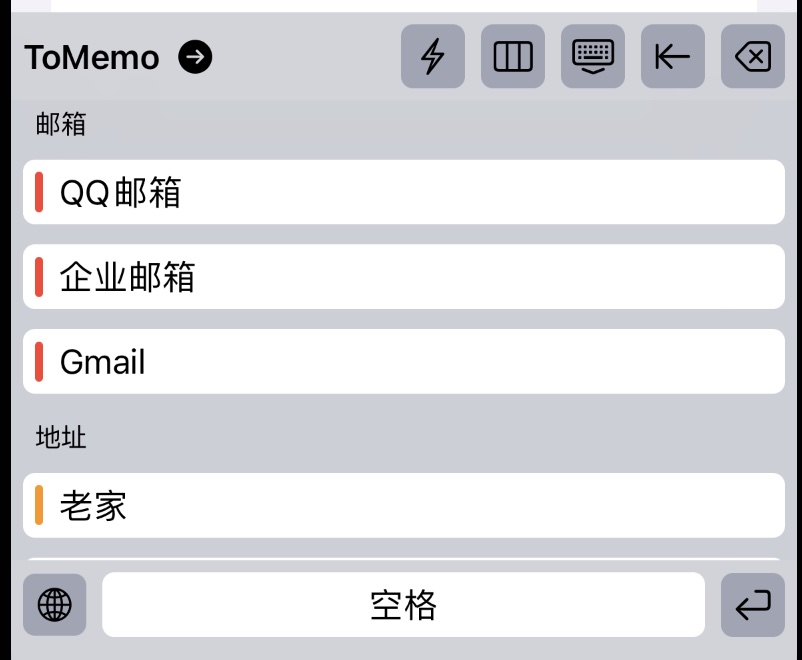
Swipe to switch lists
This feature can be enabled when the keyboard content type is “Memo”.
If there are many Memos in the keyboard, but not many lists, it can be difficult to search for the Memos by scrolling down all the time. To address this issue, we provide the ability to switch lists by swiping horizontally. You can switch lists by swiping horizontally, and scroll through the Memos in the list by swiping vertically.
Swipe example
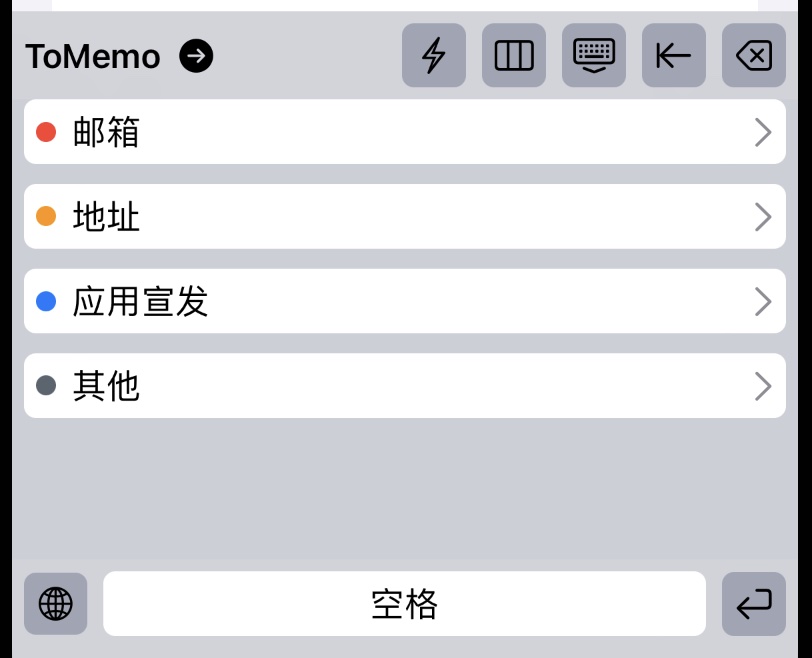
List retention duration
This feature can be enabled when the keyboard content type is “List”.
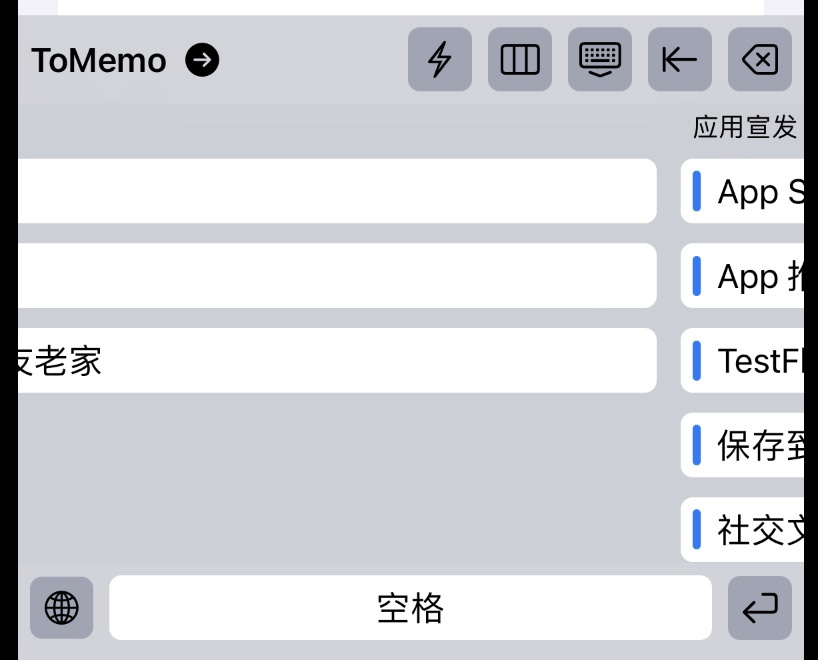
In daily use, there may be a situation like this:
There is a promotion list of an app, and you need to send the materials to your colleagues.
After switching to the ToMemo keyboard, you enter the "App Promotion" list,
click on "App Store Address", which automatically sends the app's address to the input box.
Then switch back to the native input and type some text.
And then switch back to the ToMemo keyboard and need to send "App Promotion Copywriting".
In this scenario, if the list is retained for a certain time, the last-used list will be automatically opened within the retain duration, which makes it convenient for users to directly send “App Promotion Copywriting”.
Short-term memory panel retention duration
This feature is only available when the short-term memory input has been enabled.
After using the short-term memory input in the keyboard, if you open the keyboard again within the customized duration, you will be automatically directed to the short-term memory list page.
If this feature is set to “Always”, the keyboard will always open the short-term memory list page by default.
Regarding “Retention Duration”, please refer to “FAQ/What does the retention duration in the settings mean?”
One row and multiple columns
For Memos with short titles, showing only one data per row is somewhat wasteful. Hence, users can customize the number of columns displayed per row from this feature.
This feature enables users to modify the structure of the keyboard which can enlarge the effective information display range and increase operating efficiency when there are many Memos.
Keyboard height
The ToMemo Keyboard displays more information than a traditional keyboard. And to show the users more effective information, the default keyboard height is different from that of a regular keyboard.
When switching the keyboard at the default height, the input box or the keyboard expansion bar above may shake, which is not user-friendly.
To make the keyboard switching smoother, users can customize the keyboard height. Users can directly input the height in the input box, click the background to automatically collapse the keyboard, and adjust the “keyboard space occupancy” height for preview convenience.
At the same time, two reference heights are provided.
Current keyboard
Users need to click the “keyboard height” input box to switch the keyboard to the keyboard with the reference height. Then click the “Current keyboard” button, which will automatically calculate the height adjustment needed to make the ToMemo keyboard consistent with the corresponding keyboard height.
Default
This button resets the keyboard to the default height value.
Keyboard height setting
Key sound
When clicking on the keyboard, the keyboard simulation sound is made, which has three types:
- Input
- Delete
- Function button
Enlarged display
In the keyboard, in order to display more content, the keyboard buttons are set small. To provide a better experience, the ability to enlarge buttons is provided.
Users can slightly enlarge keyboard buttons.
Current date and time
When turned on, the button for directly inputting the current time and date is added to the lower right corner of the keyboard.
You can input date and time quickly by just clicking it.
Custom toolbar layout
The custom layout of buttons in the top toolbar feature is now available. Users can freely adjust the position of buttons and the buttons that they want to open.
In the simulated top toolbar:
- Drag the button: Add or adjust the position of the button
- Double-click on a button: Delete this button
- After editing, click Save in the upper right corner
- Default: Restore to the system default layout